

Before You Start
Standalone mode lets the Hive thermostat talk directly to the receiver. Hive’s support pages say this is useful if you have connectivity issues, or if you need to control the heating without relying on the Hub. In this mode the thermostat works on the thermostat only — it will not function via the Hive app.
Need the hub and app instead? See how to pair/re-pair Hive 2 heating devices. Hive 1 uses different thermostat buttons — see pair up the devices – Hive 1.
Hive’s Hive Thermostat 2 standalone steps include a factory reset. That clears the thermostat’s local settings and any schedule stored on it.
What You'll Need
- Hive 2 thermostat (Hive Thermostat 2)
- Hive Receiver (installed and powered from the boiler isolation switch / fuse spur)
- The thermostat batteries, including one you can take out and put back during pairing
You do not need the Hive app or a working hub for standalone mode. Hive’s Hive Thermostat 2 standalone steps do not ask you to unplug the hub. If the receiver status light flashes amber or orange, that is hub/app pairing — hold the Central Heating button again until it flashes pink/white.
Standalone pairing process (Hive Thermostat 2)
These seven steps are Hive’s official Standalone Mode for Hive Thermostats wording for Hive Thermostat 2. The isolation switch / fuse spur should be near the Hive Receiver, next to the boiler.
Step 1: Isolation switch / fuse spur
Switch the boiler off at the isolation switch/fuse spur. All the lights on the receiver will then go out.
Step 2: Factory reset the thermostat
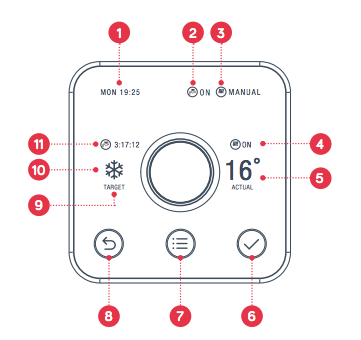
Press and hold the back arrow (button 8 on Hive’s diagram) and the menu button (button 7 on Hive’s diagram) at the same time. On the thermostat those are the bottom-left backwards-arrow icon and the bottom-middle menu button (3 dots & 3 lines). Keep them held down together until the countdown to factory reset finishes and the thermostat display says ‘Welcome to Hive’.
Step 3: Remove battery
Remove a battery from the thermostat.
Step 4: Switch the boiler back on
Switch the boiler back on at the isolation switch/fuse spur.
Step 5: Place the receiver into standalone pairing mode
Hold the central heating button down on the receiver until the status light is flashing pink/white, then release the button.
If the receiver is left searching for 40 minutes or more, the top right light will change to a solid pink/white, which means it has timed out. To get the receiver to search again, switch the isolation switch/fuse spur off and on again and check that the status light on the top right is flashing pink/white.
Hive’s reconnect article also says: if the status light flashes orange, release and press again until it changes to a single flashing pink. Amber / orange is hub pairing, not standalone.
Step 6: Place the battery back into the thermostat
Put the battery back in the thermostat. The thermostat should display the ‘Welcome, searching’ message again. When you see the word ‘Search’ disappear from the screen, the receiver status light will turn green. The thermostat will then finish pairing and rest on the inside temperature screen.
Step 7: Test and confirm that your boiler fires
Turn the target temperature on the thermostat above the ambient room temperature. You should then see that the status and central heating lights on the receiver have turned green. At this point you should also hear the boiler fire up and start heating your home.
Hive’s note: if you have a dual channel receiver and a conventional boiler, you may have to put the receiver into gravity-fed mode for the heating to come on. On gravity-fed or part-pumped boilers the hot water needs to be on at the same time for the heating to function.
Hive Receiver Light Indicators
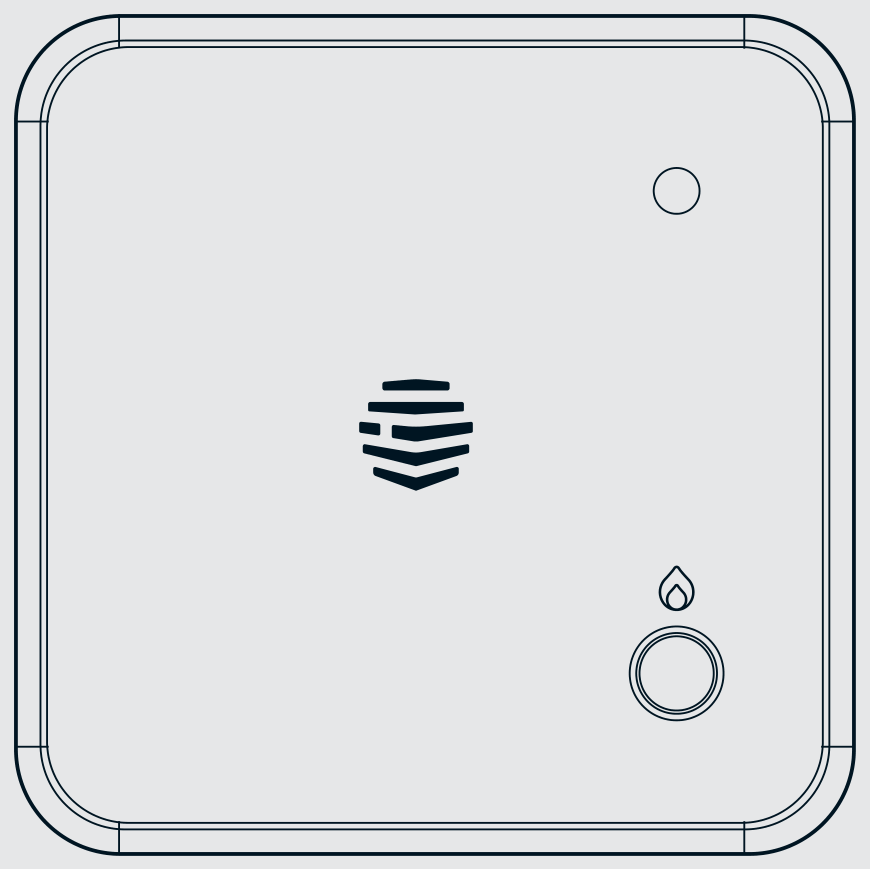
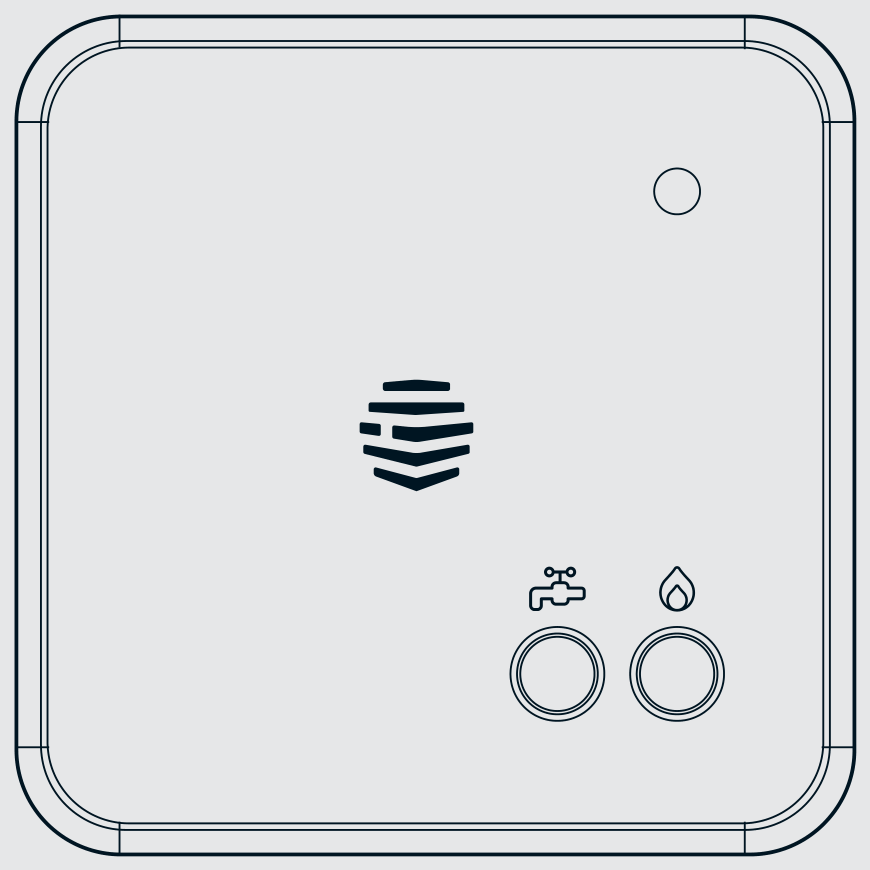
The receiver has lights on its front panel to show what it’s doing. A single channel receiver has two lights — Status and Central heating. A dual channel receiver has an additional Hot water light. Hive describes standalone search as a single pink/white flash on the top-right status light.
Status light
Both single and dual channel receivers have a Status light:
| Light | Indicator | Pattern | Colour | Meaning |
|---|---|---|---|---|
| Status |
Status
|
Flashing | Pink / White | Standalone pairing. The receiver is searching for a thermostat only (no app/hub). This is the light you want for this guide. |
| Status |
Status
|
Solid | Pink / White | Standalone search has timed out (about 40 minutes). Power-cycle the isolation switch/fuse spur so the light flashes pink/white again. |
| Status |
Status
|
Solid | Green | Paired and operating. After standalone pairing, Hive says this light turns green when ‘Search’ disappears from the thermostat. |
| Status |
Status
|
Solid | Blue | Gravity-fed mode. Hive says the receiver flashes blue for 3 seconds, then goes solid blue. |
| Status |
Status
|
Double flashing | Amber | Hub / app pairing — not standalone. Release and hold Central Heating again until the light is a single pink/white flash. |
| Status |
Status
|
Flashing | Amber | The receiver has found the hub and is ready to pair with the thermostat. This is connected (online) mode, not standalone. |
| Status |
Status
|
Solid | Red | The receiver has lost its wireless connection to the thermostat. Heating and hot water default to off, but can be switched on with the receiver buttons (hot water only on dual channel). |
Central heating & Hot water lights
| Light | Indicator | Pattern | Colour | Meaning |
|---|---|---|---|---|
| Central heating Single & dual channel |
Heating
|
Solid | Green | Heating is on. Hive’s test step: this light turns green when the target temperature is above room temperature. |
| Hot water Dual channel only |
Heating
Hot water
|
Solid | Green | Hot water is on. This light is only present on dual channel receivers. |
Troubleshooting Standalone Issues
Devices won't pair
- Wrong pairing colour: Flashing amber / orange is hub mode. Hold Central Heating again until the status light is a single flashing pink/white.
- Search timed out: Solid pink/white after about 40 minutes. Power-cycle the isolation switch/fuse spur and confirm a pink/white flash before you put the battery back.
- Thermostat screen is not ‘Welcome, searching’: Hive’s reconnect article says to repeat the factory reset if anything else appears. Press and hold the back arrow (button 8 on Hive’s diagram) and the menu button (button 7 on Hive’s diagram) until the screen shows ‘factory reset’ and counts down from 10 to 0. Release when ‘welcome’ appears.
- Take the thermostat to the receiver: Hive’s reconnect steps say to press the tab underneath the Hive 2 thermostat, take out one battery, and take the thermostat to the receiver near the boiler or hot water tank.
Already in standalone — reconnect the thermostat
If the devices were already in standalone mode and have lost each other, Hive’s Standalone: Re-connecting Your Hive 2 Thermostat to the Receiver sequence is:
- Press the tab underneath the thermostat to remove it from the wall, and take out one battery.
- Take the thermostat to the receiver.
- Turn the boiler off at the mains isolation switch (the lights will go out), then turn it back on.
- Press and hold the central heating button (bottom right) until the status light (top right) changes to single flashing pink. If it flashes orange, release and press again until it is single flashing pink.
- Reinsert the battery. Press and hold the back arrow (button 8 on Hive’s diagram) and the menu button (button 7 on Hive’s diagram) until the screen shows ‘factory reset’ and counts down from 10 to 0. Release when ‘welcome’ appears. The thermostat will then display ‘searching’ with a timer.
- If anything else appears on the thermostat screen, repeat the factory reset.
- When found, the receiver’s status light (top right) will turn solid green, and the thermostat will display ‘let’s take a tour’.
- Raise the target temperature above the room temperature to test the boiler.
Power-cycle first
If you only need to wake an already-paired standalone system, Hive’s Standalone: Power Cycle the Hive 2 Thermostat and Hive Receiver steps are: switch the boiler off; remove the thermostat from the wall (tab underneath) and take it to the boiler; remove one battery; switch the boiler back on; put the battery back; put the thermostat back on the wall; turn the dial and press it in to raise the target temperature above room temperature. Success is the boiler firing and the central heating light turning green.
Gravity-fed / part-pumped systems
From Hive’s Gravity-Fed Mode for Hive Thermostats page:
- Switch off the boiler using the isolation switch.
- Wait at least 5 seconds, then switch the isolation switch back on.
- Press and hold the hot water button on the receiver for at least 10 seconds until the status light turns blue.
- The receiver will flash blue for 3 seconds, then go solid blue to indicate it is in gravity-fed mode.
In gravity-fed mode you can call for hot water only, but calling for heating will also turn on the hot water to fire the boiler.
Thermostat not working — use the receiver buttons
Hive’s stay in control article says you can still run heating from the receiver: press the button under the flame icon — the light at that button turns green when Hive has asked the boiler to turn heating on. On a dual channel receiver, press the button under the tap icon for hot water.
Frequently asked questions
What is Hive standalone mode?
Standalone mode allows your Hive thermostat and receiver to operate independently of the Hive Hub. The thermostat communicates directly with the receiver, so heating can still function if there are network problems or the Hub is unavailable.
Can I still use the Hive app?
No. Hive says that if you pair in standalone mode, the thermostat will work via the thermostat only and will not function via the Hive app. To use the app again, pair the devices with the hub (status light double-flashing amber, then the app).
Do I need to unplug the Hive Hub?
No. That step was on the old version of this page and is not in Hive’s Hive Thermostat 2 standalone instructions. Get the receiver onto a flashing pink/white status light. If it flashes amber or orange, hold Central Heating again until it is pink/white.
Which buttons do I press on Hive 2?
Hold the back arrow (button 8 on Hive’s diagram) and the menu button (button 7 on Hive’s diagram) together. Hive’s numbered Thermostat 2 diagram — the same labelled drawing on this page — marks 8 as the Back button and 7 as the Menu button. Hive Thermostat Mini uses the down arrow and the menu ‘O’ icon instead — see the same official standalone article for Mini wording.
What if the status light is solid pink/white?
The receiver has timed out of standalone search after about 40 minutes. Switch the isolation switch/fuse spur off and on again so the top-right status light is flashing pink/white, then put the battery back in the thermostat.
How do I go back to hub and app control?
Follow How to Pair/Re-pair Hive 2 Heating Devices and Hive’s Step-by-Step Guide to Reconnecting Your Hive Heating Devices: hold Central Heating until the status light double-flashes amber, then pair through the app.
Official Hive sources
Button sequences and light colours on this page follow these Hive support articles. Button numbers 7 and 8 are from Hive’s official Thermostat 2 diagram (Menu = 7, Back = 8). If Hive updates the wording, use their pages.
- Hive Active Heating 2 Wireless Thermostat User Guide — numbered diagram: 7 Menu button, 8 Back button
- Standalone Mode for Hive Thermostats — Hive Thermostat 2 pairing steps used above
- Standalone: Re-connecting Your Hive 2 Thermostat to the Receiver
- Standalone: Power Cycle the Hive 2 Thermostat and Hive Receiver
- Step-by-Step Guide to Reconnecting Your Hive Heating Devices — pink/white vs amber status lights
- Gravity-Fed Mode for Hive Thermostats
- Hive Heating and Hot Water: How to Stay in Control When the Hive App or the Thermostat Stops Working
Related guides
- How to pair/re-pair Hive 2 heating devices (hub and app)
- How to pair up the devices – Hive 1
- Nest and a combi boiler
- Advice
Still Having Issues?
If you are still having problems after these official Hive steps, contact Hive support. For wiring or boiler work, use a qualified heating engineer.
Hive Thermostat Mini (SLT6) installation guide (official PDF)